Getting Started
Create a project
Create a project
You can create a new project by navigating to "Projects" in the main navigation in the top. Once you're on the projects page, you'll find a "New project" button in the top right corner.
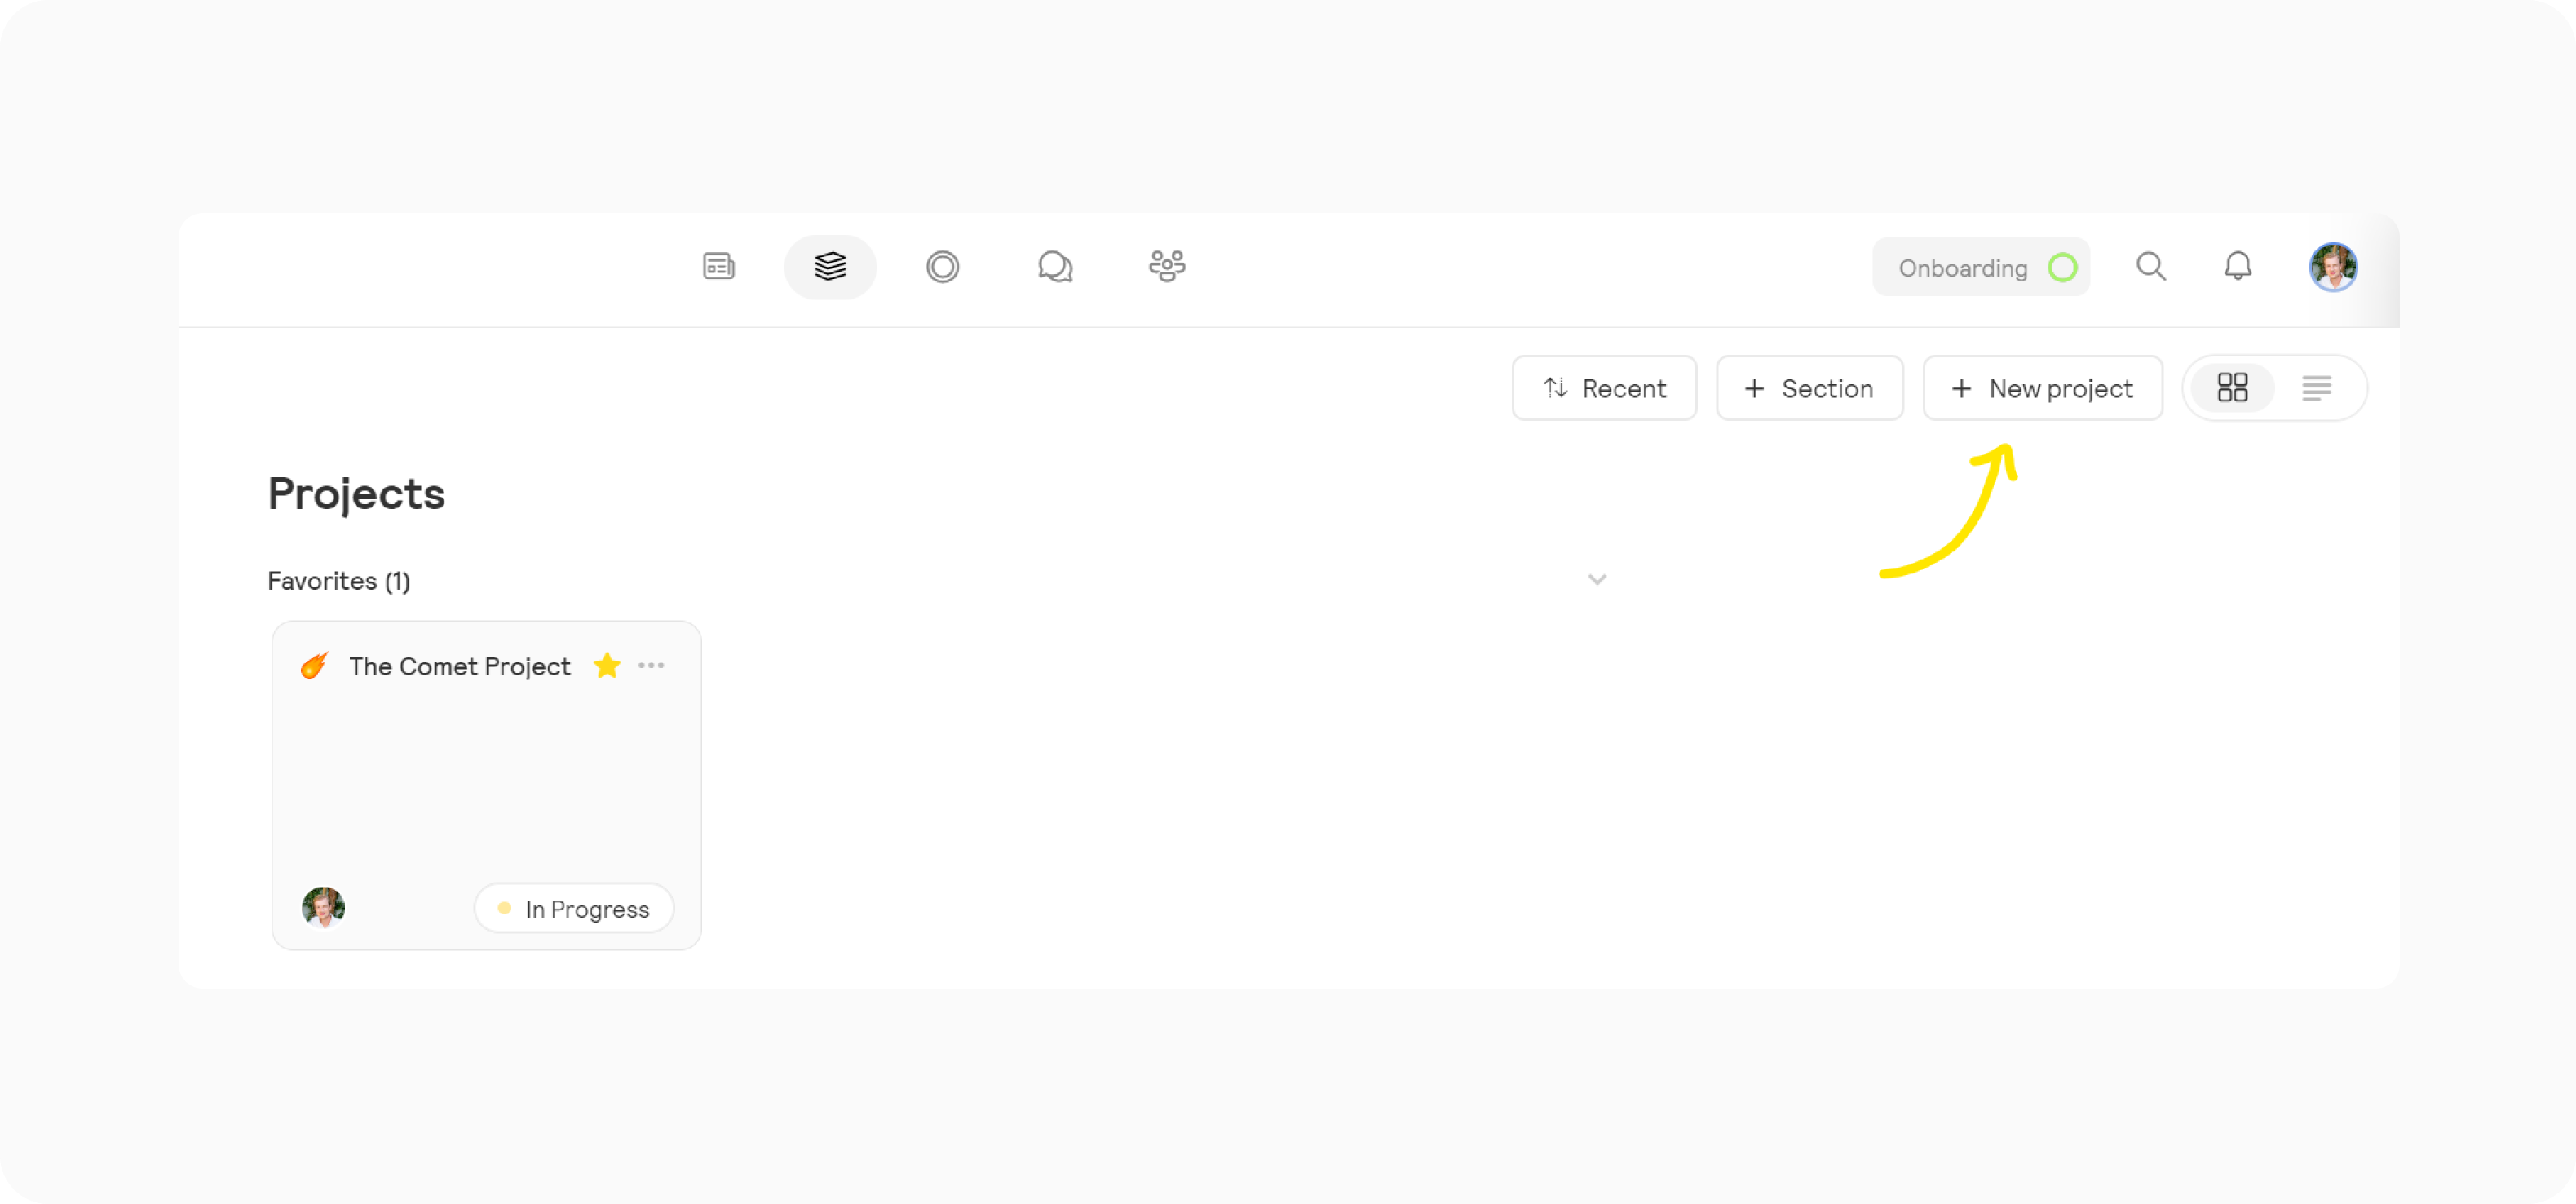
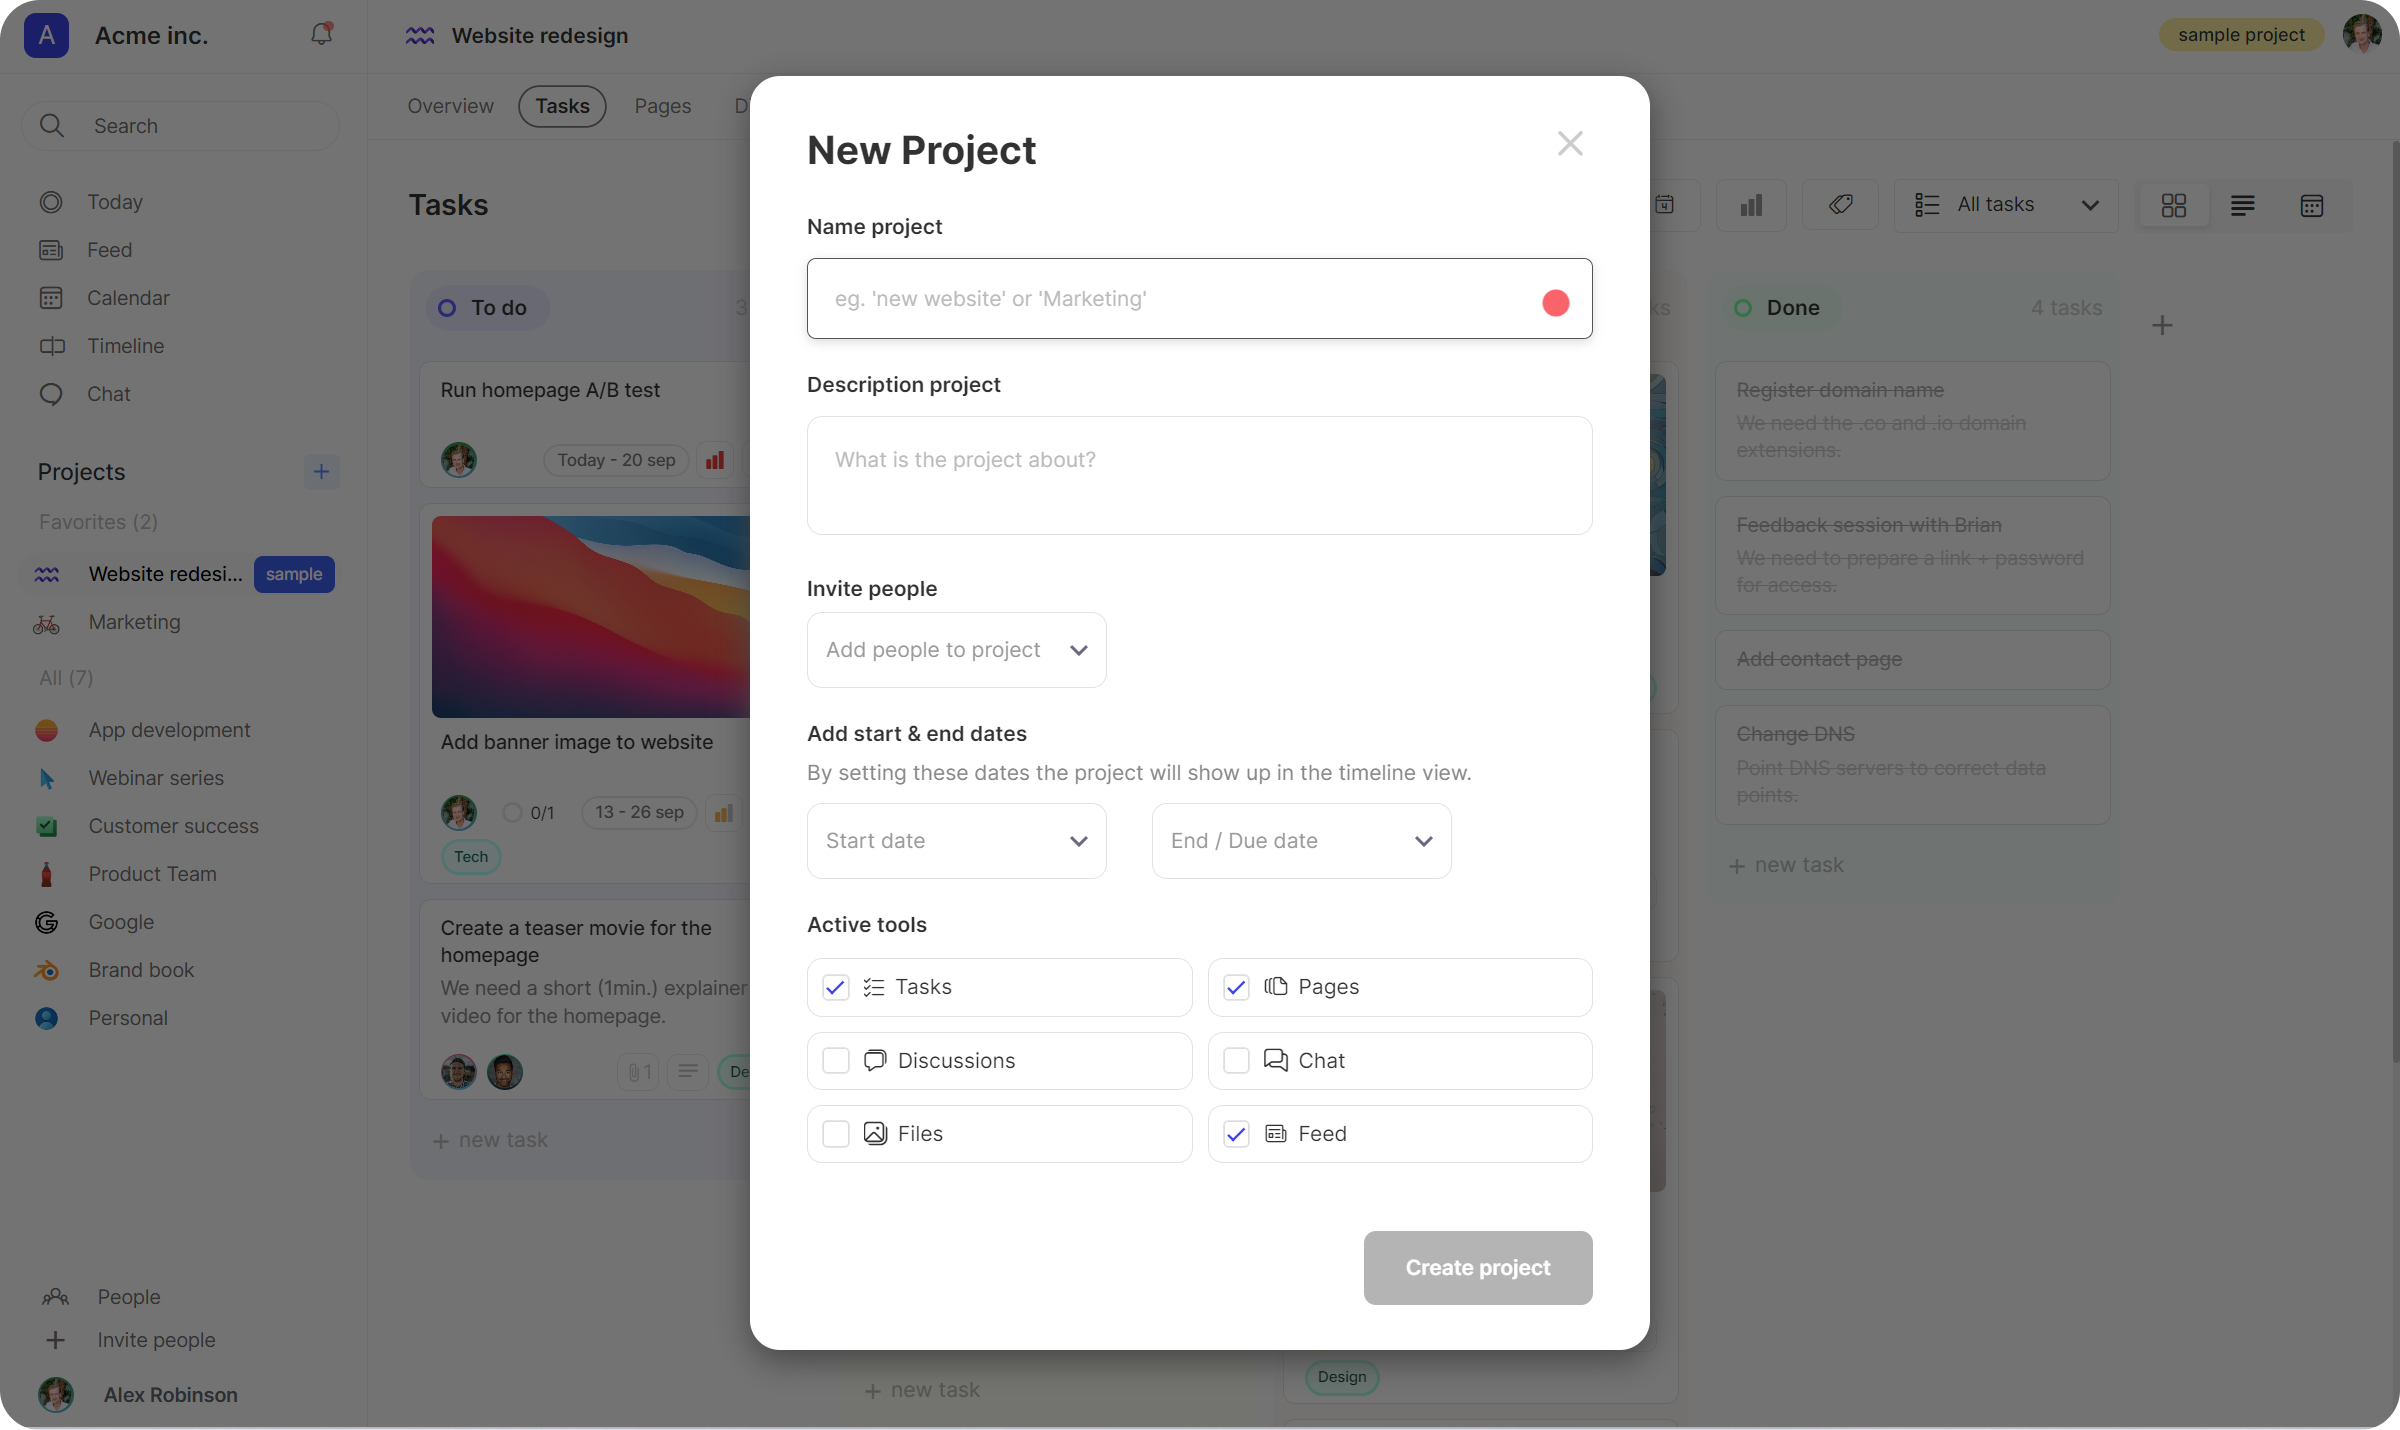
When you click on "New project", a modal will open where you can define your project details. You can choose an icon for your project, provide a title and description, invite team members, set project dates, and select the tools you want to use for this project.
Once you've completed these steps, click 'Create Project'.
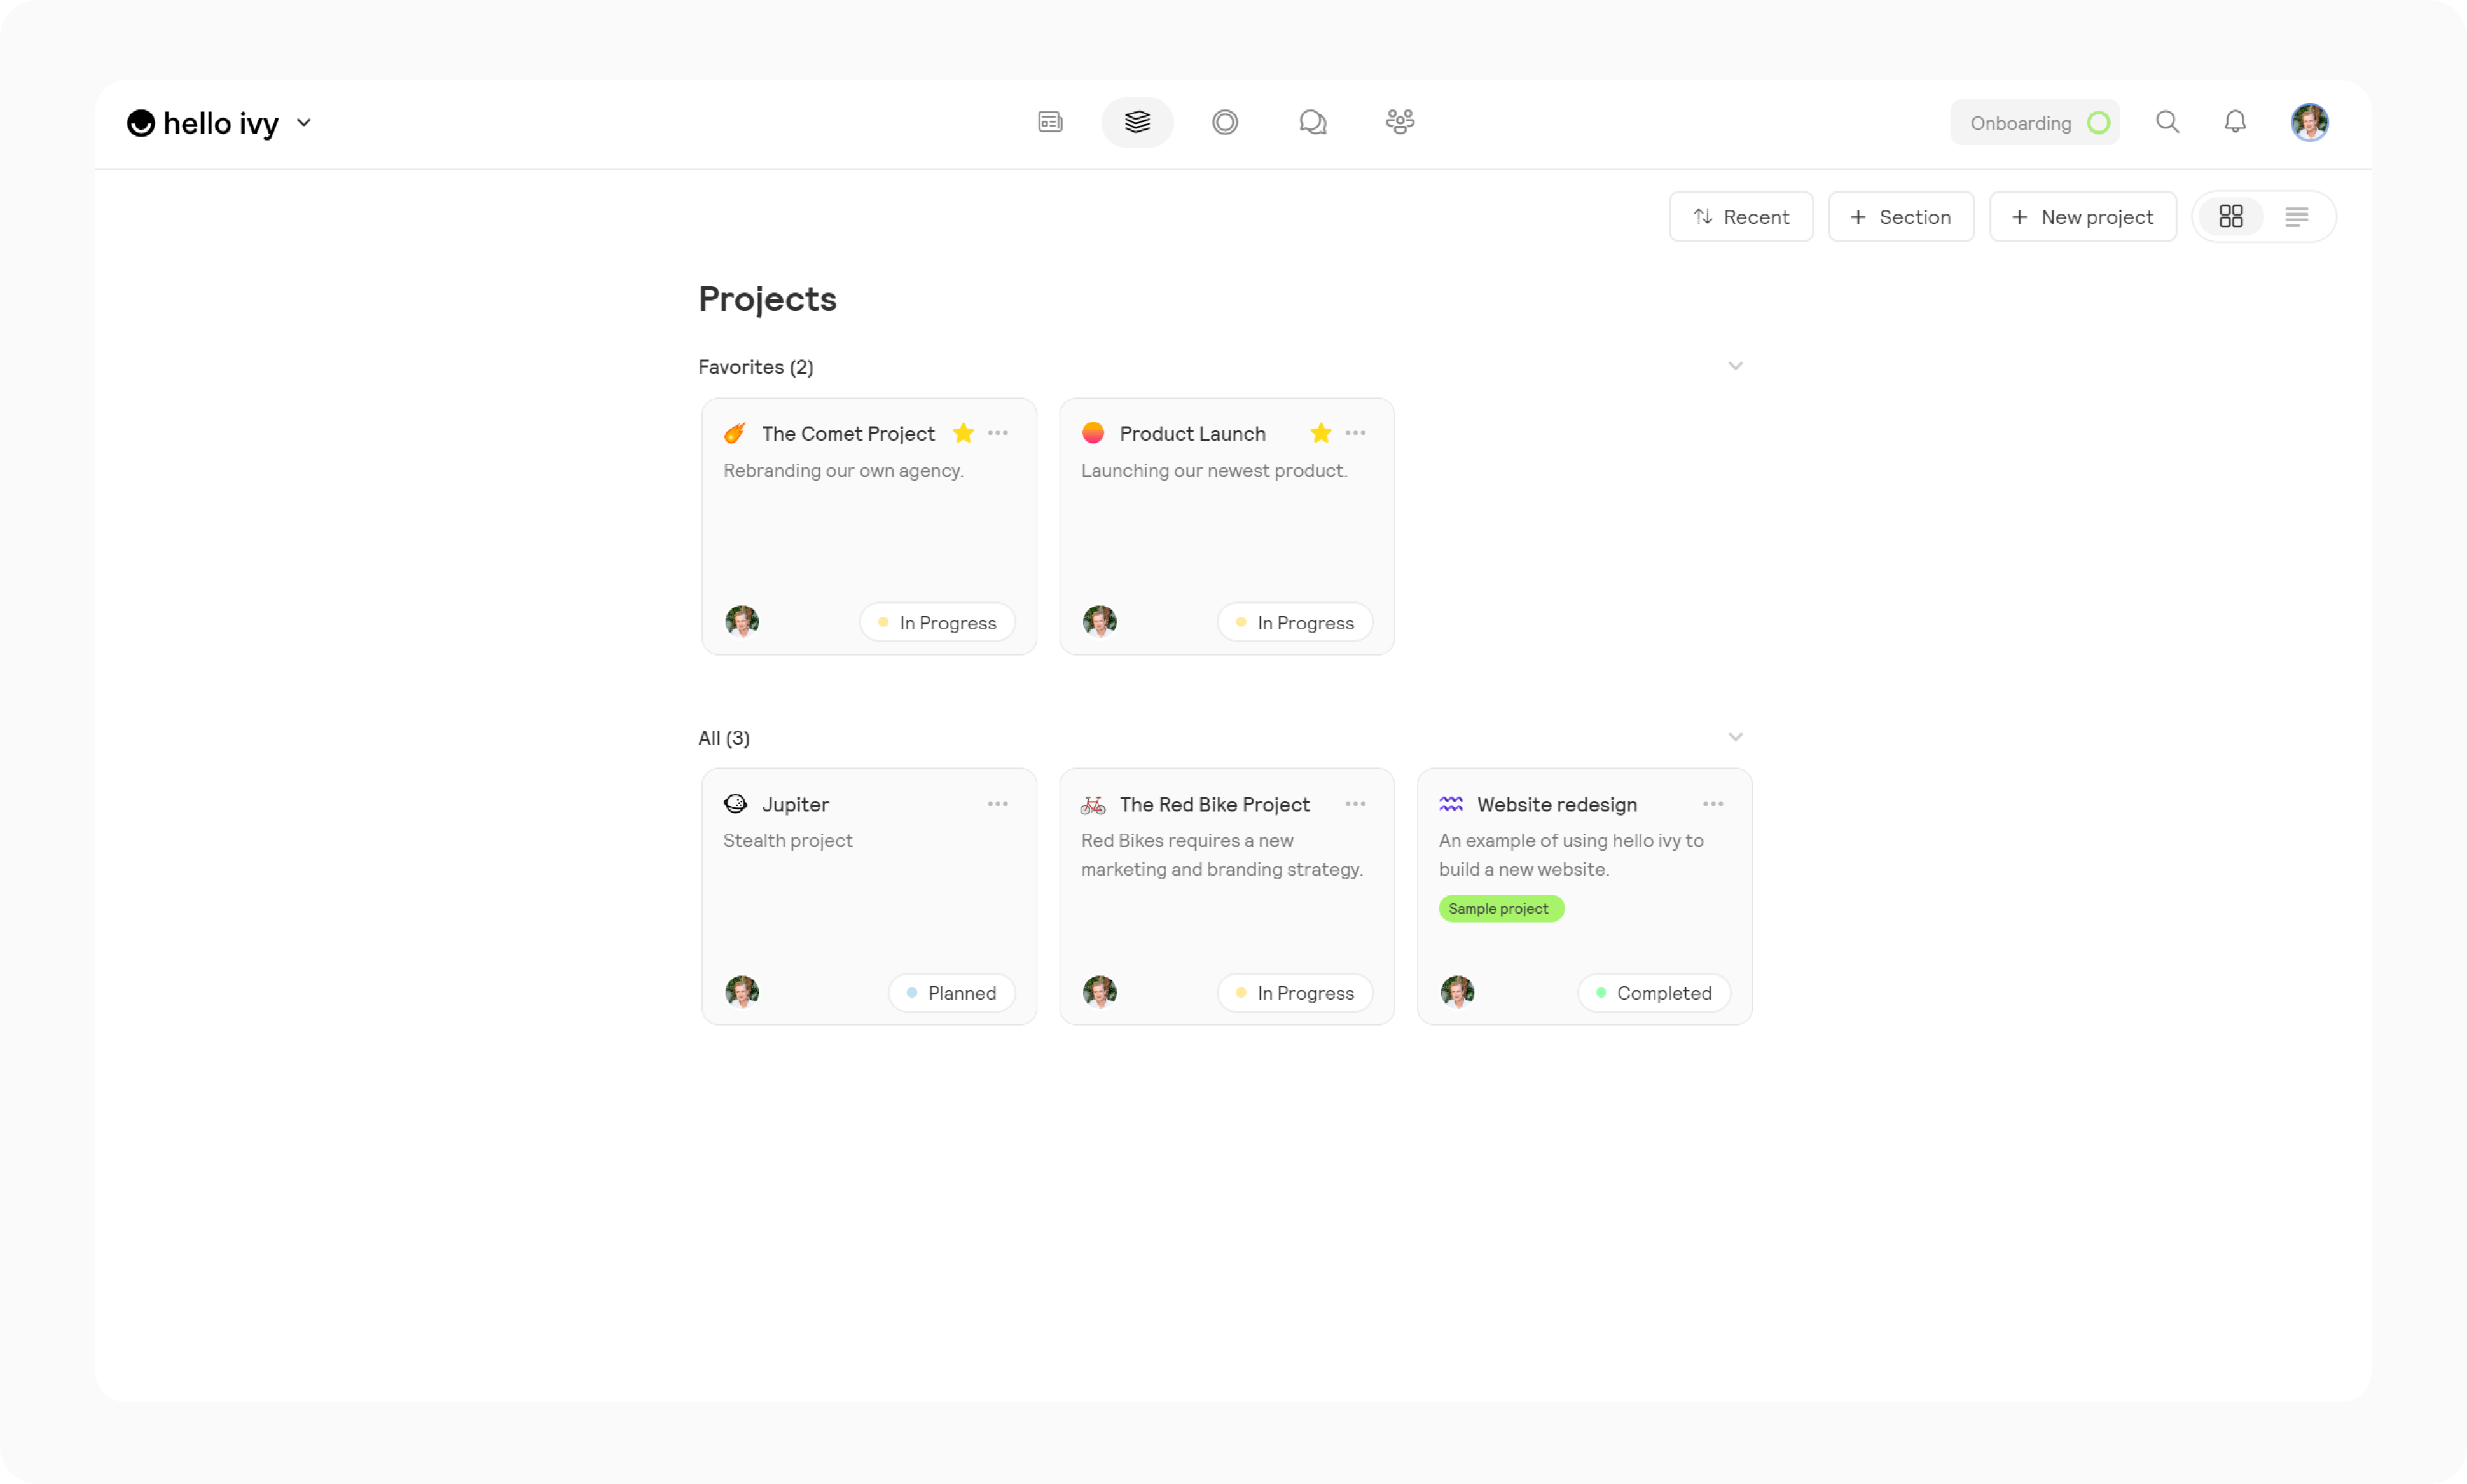
We recommend creating a project for each topic you're working on. Additionally, it's a good practice to create a project for each team (no need for project dates), allowing each team to have its dedicated workspace for tasks, documents, files, and team communication.
Project sections (folders)
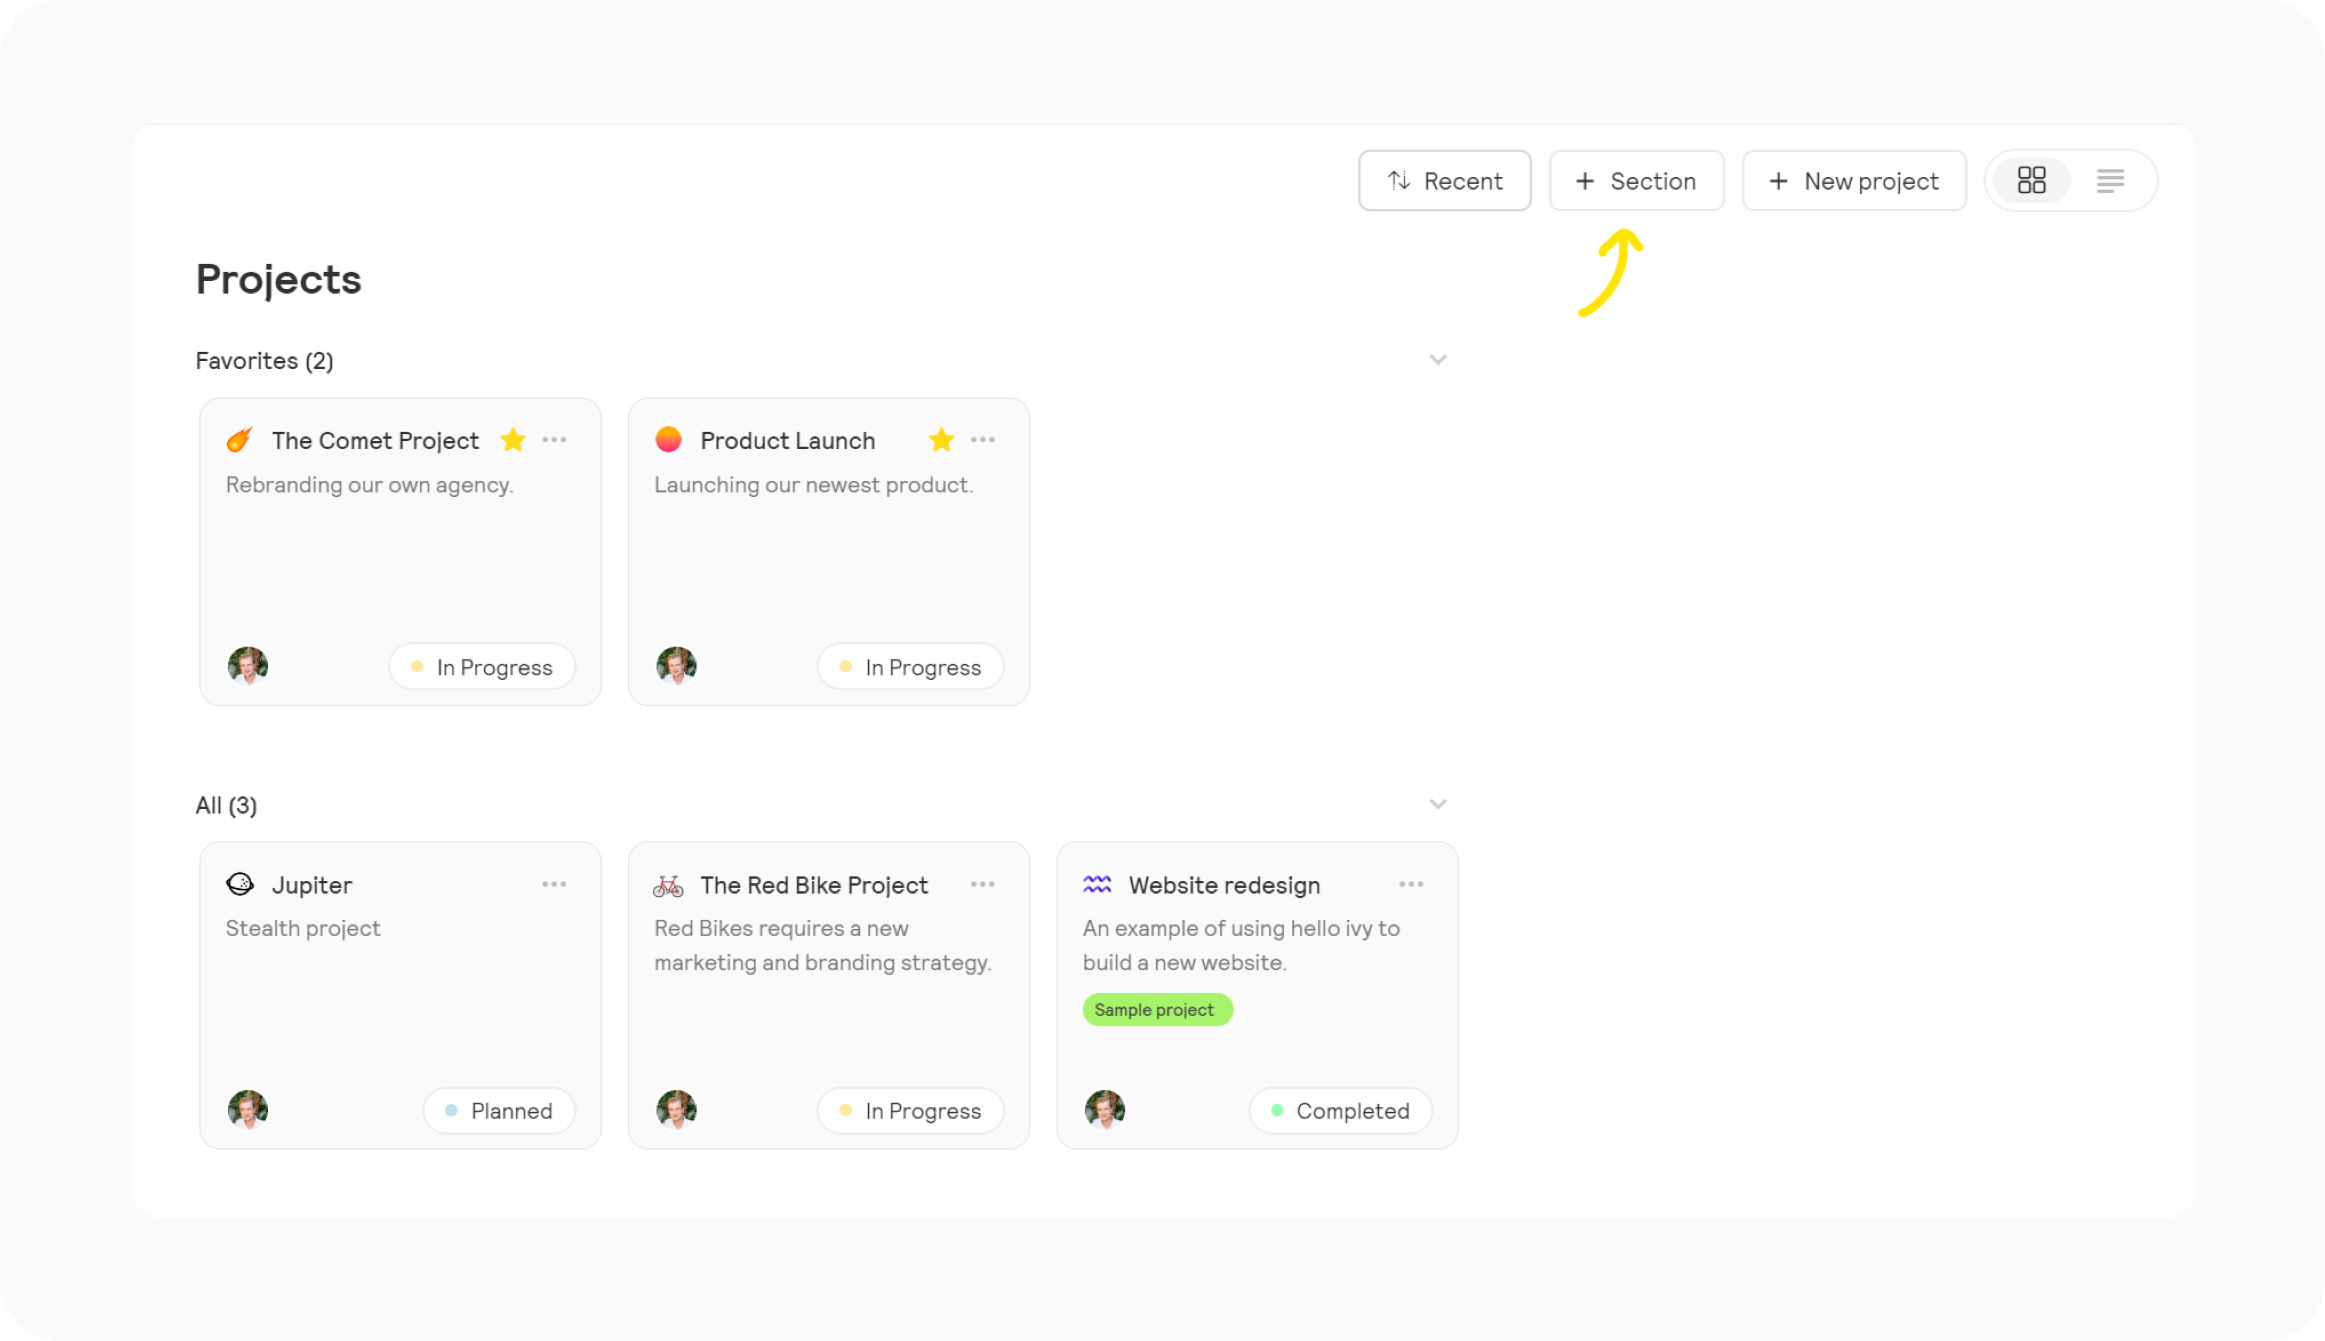
If you want to organize your projects under different subjects, you can add a section. You can use the same '+ Section' button next to the "+ New project" button. A section is similar to a folder; you can categorize your projects into sections for a neatly organized workspace. By default, there is just one section called 'All.' Once you favorite a project, another section called 'Favorites' will be created. You can add as many sections as you need.
Create a project
You can create a new project by navigating to "Projects" in the main navigation in the top. Once you're on the projects page, you'll find a "New project" button in the top right corner.
When you click on "New project", a modal will open where you can define your project details. You can choose an icon for your project, provide a title and description, invite team members, set project dates, and select the tools you want to use for this project.
Once you've completed these steps, click 'Create Project'.
We recommend creating a project for each topic you're working on. Additionally, it's a good practice to create a project for each team (no need for project dates), allowing each team to have its dedicated workspace for tasks, documents, files, and team communication.
Project sections (folders)
If you want to organize your projects under different subjects, you can add a section. You can use the same '+ Section' button next to the "+ New project" button. A section is similar to a folder; you can categorize your projects into sections for a neatly organized workspace. By default, there is just one section called 'All.' Once you favorite a project, another section called 'Favorites' will be created. You can add as many sections as you need.